Instagram Twitter Etsy
  • Home
  • Start here!
  • Kitchen
    • Baking
    • Bread
    • Drinks
  • Home
    • Home
    • Knitting and wool
  • Outside
    • Around Trondheim
    • The Move
    • Walking
  • Lifestyle
    • Frugal Friday
    • Going green
  • About
  • Contact

Aleks in Norway


They say necessity breeds invention - so when you're replanting your Zamioculcas zamiifolia and the rhizomes don't fit in the pot you had prepared... you need to find something ASAP. I scanned the kitchen for something that could easily be transformed into a new house for one of the ZZ plant babies, and my eyes landed on a few milk cartons that needed to be taken outside to the dumpsters.

Would it work? I did a mental checklist...

  • designed to hold water ✅
  • big ✅
  • free ✅
  • drainage hole ✅


I decided to try it out...

In general, I know that tetrapak cartons technically can be recycled... but I'm kind of dubious about how true that is. It's thin layers of plastic on a cardboard base, so do I put it with paper? Do I put it with plastics? How much energy is used in the recycling plant to separate the layers?

I recently wrote a post on how I would like to reduce waste and be more environmentally friendly - this is a great way to reuse something that would otherwise go in the bin, and also stops me buying another plastic pot. I love using washed yoghurt pots to replant small plants, so this could be a great way to replant the bigger ones.

First thing I did was to cut open the carton - about 1/3 of the way from the bottom. You want more room in the "pot" than in the "saucer".


Make sure you give the pot a really good wash! You don't want any food bacteria to had a bad effect on your plants or to turn the soil mouldy. A scrub with some washing up liquid and warm water should do just fine. Make sure you wash in the nooks and crannies too!


Keep the lid screwed on for now - fill the pot with soil and pack down well around the screw top. Add in your plant, and water well.


I then unscrewed the top and my soil stayed in without any problems - only water drained through. If you're worried about soil falling out of the hole, you could poke holes in the plastic cap and screw it back on (this would still allow for drainage, without a huge hole for the soil to fall out from).


Stand the "pot" in the remaining 1/3 of the milk carton, so it can catch any excess water - just remember to empty out the bottom so that the water doesn't go stagnant.

Do you repurpose anything at home that would otherwise be thrown away?

November 09, 2018 No comments


So you've got your sourdough down pat... now what? Now it's time to play around with some new flavours! These can be as simple as dry additions folded into the dough, or flavoured liquids used as a dough base. Here are some I tried recently.


Olive sourdough


Start with your standard bread recipe - make the pre-mix for autolyse, add your starter, and perform one stretch and fold. Roughly chop two handfuls of olives, and start incorporating them from the second stretch and fold. That's to say: sprinkle a quarter of your olives on top of the dough, and perform one stretch and fold. Turn the bowl 90 degrees, sprinkle a quarter of your olives, stretch and fold once. Repeat twice more, such that you've added in all the olives. With each subsequent stretch and fold, the olives will mix in better into your dough. Shape and bake as normal - stick to simple scoring due to the "lumps" in the dough. 


Roasted red pepper sourdough


Start with your standard bread recipe. Before mixing the dough, make the red pepper puree.

I used:
  • 3 red peppers
  • 4 garlic cloves (we like things garlicky)
  • 1 tsp chilli powder
  • 1 tsp sugar
  • 1 tsp salt
Bake the peppers at 180-200c until they're soft and lightly blackened, you can also do this on a grill. Peel the skin, and place the roasted flesh into a blender. Add the garlic, salt, sugar, and chilli powder. Blitz to a chunky paste (I did this in a pestle and mortar and it was fine too!). Adjust salt, sugar, chilli to taste. You want the paste to be quite sweet and spicy. 

Strain the puree through a cheesecloth or fine sieve, to separate the liquid and the pulp. 

Make the pre-mix for autolyse, using the red pepper liquid in place of part of the water (so, if you have 100g of liquid, add 190g water to get the 290g water total needed for the dough). Let autolyse overnight. Follow the steps for adding the starter and the first stretch and fold, and from the second stretch and fold begin to incorporate the red pepper pulp.That's to say: spread a quarter of your pulp on top of the dough, and perform one stretch and fold. Turn the bowl 90 degrees, spread a quarter of your pulp, stretch and fold once. Repeat twice more, such that you've added in all the red pepper pulp. With each subsequent stretch and fold, the red pepper chunks will mix in better into your dough. Shape and bake as normal - keep an eye out for the colour of the crust, as it can darken very quickly. 

. . . . . 

I'm forever trying new experimental flavours and additions to the dough - what would you like to try?
November 09, 2018 No comments

I'm not a huge coffee lover - usually I'm fine with a quick cup of instant Nescafe with a splash of milk. Buuuuut, once every so often, I get the urge for a foamy, frothy, creamy treat - not easy when you don't have any ground coffee or a fancy milk steamer or an espresso machine, right? Wrong! This method is quick and simple, and the end result is really yummy. It's also a great way to drink "fancy" coffee for a fraction of the price.

You will need:


2 tsp instant coffee granules (I use Nescafe Gold)
1-2 tsp sugar, to taste
Small cup of hot water
1 cup hot milk (or a mix of milk and water, I like milk to water at a 1:1 ratio)
Fork or whisk


Method:


1. Put your coffee granules and sugar into a bowl, and add 1tsp hot water.


2. Use a whisk or a fork to mix together. At first, it will be like rocky mud, but soon the coffee will dissolve and become smooth. Add a few drops of hot water at a time, and keep stirring! All the granules will dissolve, and you'll get a fluffy and creamy mixture with the texture of a fluffy custard or cream whipped to soft peaks. It will be light in colour, and really glossy.


3. Add the mixture to a mug - about 2 tsp for a small mug, and 3-4 tsp for a big mug. You can always stir in a little more if it's not strong enough, but you can't take it away!


4. Gently pour over the hot milk, and give the coffee a very gentle stir. Drink immediately!


November 08, 2018 No comments


I love autumn - there's something about the season that warrants warm, snuggly blankets and a hint of  spice. These biscuits are a perfect buttery treat for October comfort, especially if you want a change from cinnamon or pumpkin spice. And if I, a self-confessed cardamom hater, like them... well, then you really know they're good ðŸ˜‰

These biscuits are so easy! They're every so slightly crisp yet crumbly, dry yet buttery - adapted from traditional sugar cookie recipes for the texture and snap that I like best. The zesty orange is bright and floral, and the cardamom provides a warm herbal tone which is perfect for a cold and windy autumn day. White chocolate adds a final note of sweetness, and it's a great alternative for the more common pecan, apple or cinnamon flavours typical of this time of year. Enjoy with a glass or milk or hot mulled cider.

Ingredients:
Makes 50 biscuits (6cm diameter)


  • 225g softened butter 
  • 200g sugar
  • 2 eggs
  • 450g all purpose flour
  • 1 tsp salt (omit if using salted butter)
  • 1 tsp baking powder
  • 1.5 tsp ground cardamom
  • 1 tsp vanilla extract (or 1 tsp vanilla sugar)
  • zest of 2 oranges
  • white chocolate as needed for dipping/drizzling


Method:

1. Give the butter a good stir, and mix in the sugar and cardamom. If you're using vanilla sugar, add it in now. Beat until pale and fluffy. I used a wooden spoon for this, but you can also use a mixer.


2. Beat in the eggs (and vanilla extract, if using).

3. Stir in the orange zest. Your kitchen should smell amazing by now!


4. Mix together the flour, baking powder, and salt, and stir gradually into the wet mixture. It will be difficult to stir in by the end - turn out onto a floured surface and gently bring the dough together. Don't knead too much, else the biscuits will be tough. If your dough is too sticky, gently knead in a little more flour until the dough is soft but smooth, like warm play-doh.


Sticky dough on the left, smooth on the right:


5. Chill in the fridge for at least an hour, until the dough is cold and firm.

6. Before you roll out the dough, preheat the oven to 180c (reduce slightly for fan assisted oven as necessary).

7. Roll out the dough on a floured surface to half a centimetre thick, and cut out shapes of your choice. I used a 6cm circular cutter (okay, a drinking glass) and came out with 50 biscuits. You can also roll between two sheets of baking paper (my preferred choice).


8. Bake for 10-12 minutes, until the edges and underside are golden. The top of the biscuit will be pale and soft, it will harden up as it cools so don't be tempted to overbake. Cool on a wire rack.


9. Melt some white chocolate over a double boiler - either dip the biscuits half or all the way, or gently drizzle over the top. This all depends on how sweet you want the biscuits to be. They are ready to serve once the chocolate has set. Enjoy!


October 23, 2018 No comments


Recently, the newest IPCC report on climate change came out... and guys, it's not looking good. I've never been militant about the environment, but more and more I'm beginning to worry what the quality of life will be for my children and grandchildren and so if I can take small steps to keep everything going to shit, I'm going to try my hardest and hope other people do the same.

I've been looking into ways to reduce the amount of waste that my house contributes to the enormous piles of landfill out there, and I've decided to set myself some goals for next year. I figure, if I can do it, others can do it. And I'm only one person out of seven billion... but if more and more people take this on, then we have a real chance of making a difference, even if just a little one.

The requirements: it has to be cheap, it has to be easy, and it has to be reasonable. I'm not going to spend money I don't have on specialist equipment, I'm not going to spend three years weaving together potato sacks to use for shopping, and I'm not going to clomp around in hand-carved clogs while wearing organic hemp clothing.

This video was just what I was looking for! Really easy to understand, and made some wonderful points. Many of the solutions she mentions are really relevant to us, and so it's a really great starting point.


Here are the steps outlined:

Get rid of cling film and switch to wax food wraps
I am actually ashamed of how much cling film we use... And how many plastic zip-lock bags. The key to this is making better use of reusable Tupperware boxes, and using wax wraps to keep food fresh. They are reusable, the beeswax is antimicrobial, and they're a frugal way to store your food.
Status: not even close
Goal: don't buy any more ziplock bags, and buy and/or make beeswax wraps for food storage. 

Swap plastic water bottles for a reusable bottle
We have a number of plastic and glass reusable bottles at home, and we drink exclusively tap water. Recently, R bought a Soda Stream so that we wouldn't buy plastic bottles of sparkling water. We also take bottles of water with us as much as possible, and very rarely buy water when we are out of the house.
Status: pretty good!
Goal: make sure to take water with us always

Stop using paper coffee cups
We actually don't buy takeaway tea or coffee... so I'd consider this a moot point. If we do go to a cafe, it's to sit in. I also have a lovely thermos cup that R brought me back from the USA a couple of years ago, so I make a cup of tea and take it to school with me in the mornings instead of buying tea or coffee once I'm there.
Status: pretty good!
Goal: if I get tea/coffee in a cafe, have it inside and not take away

Stop using plastic straws
I confess, I am an offender. I don't use straws at home, but when I drink something at a bar or a restaurant, I do enjoy a straw... And something so small becomes so wasteful when used so often. The easiest way is to swap for a set of glass or steel ones that can be rewashed and reused, or carry a small pack of paper straws that are biodegradable.
Status: not even close
Goal: buy a set of glass or steel straws, specifically a collapsible one I can put in my handbag, or just drink without a straw if I don't have one

Refuse plastic cutlery and napkins when you order a takeaway
We don't order takeaway here so I'd consider that a moot point?
Status: n/a
Goal: n/a

Stop using plastic carrier bags
Carrier bags are such a huge part of all the waste out there, and it's one of the easiest things to eliminate. We use heavy duty grocery bags whenever we go shopping, and as much as possible we put small items into our backpacks and my handbag... That said, sometimes we buy something big unexpectely and don't have a bag, so we do very occasionally pick up a new plastic bag. That bag is reused for other things in the house and not immediately discarded which may be a plus?
Status: almost there!
Goal: carry a small reusable bag in my handbag

Replace single use teabags with loose leaf and a tea strainer
I love tea! We drink a lot of tea. But a lot of teabags have a plastic string, or a the tag at the end of the string is plastic, and can't be recycled. It's also a lot of waste for one cup of tea. It's much more environmentally friendly to use a small strainer and loose leaf tea. Although I don't think it's possible for us to use only loose leaf tea, the difference we can make is what sort of teabag packaging we use. We have a lot of tea from Republic of Tea - small round bags without a string, and with only unbleached material (paper, fabric? what is it?) which is of course much better than a teabag with a plastic string and plastic tag. My goal here is to transition more to using loose leaf, and inspecting the makeup of teabags before I buy.
Status: halfway there
Goal: use only unbleached teabags if I have to use teabags, try to switch over to loose leaf as much as possible

Switch to bar soap
Bar soap tends to have much less packaging than plastic bottles of liquid soap - often just a piece of paper, or you can buy "naked" bars. Stores like Lush are now making solid shower gels where you can further reduce the packaging you use. We already use shampoo bars (I like Seanik, R uses New), and conditioner bars (I use Sugar Daddy-O), and I've recently started to use soaps from The Printed Peanut instead of face wash and shower gel. Packaging is close to zero, and they all smell really lovely.
Status: pretty good!
Goal: switch out liquid handwash for bar soap

Use cloth napkins instead of paper, handkerchiefs instead of tissues, and microfibre towels instead of paper towels
We are really, really bad at this. We go through a lot of paper towels in the house, mainly for cooking and cleaning. We actually do have a huge stack of tea towels that we should be using more, and we should switch to fabric napkins even if just to feel like a king and queen at dinner! Using handkerchiefs is at first thought pretty gross to me, but if people can use cloth nappies then a few bogeys should not be anything nasty, right?
Status: hmm... not great
Goal: use fabric more, buy some handkerchiefs and napkins. 

Swap out parchment paper for silicone baking mats
I bake and roast a ton. I go through a lot of parchment paper and I recently found out that it's not recyclable. Oops! This needs to be sorted out asap.
Status: no bueno
Goal: buy a couple silicone baking mats and stop using paper

Reuse old t-shirts and socks for cleaning the apartment
Aha! I actually started doing this recently after a pair of well-loved flannel pyjama bottoms met their demise. I washed and dried as normal, and cut them up into squares to use for cleaning.
Status: pretty good!
Goal: keep it up

Make your own cleaning products
I've definitely thought of this before, but I've never implemented it. I do tend to supplement my cleaning products with  natural items such as bicarbonate of soda and also vinegar, so this is definitely something to look into. Firstly, because you're reducing the packaging used (no more unnecessary plastic bottles) and secondly, you're not spraying harmful chemicals around the house. We don't currently have kids or pets but it would be a great habit to get into before they turn up. And actually, it's pretty good for the piggybank which is another bonus.
Status: not great
Goal: look for recipes, start making homemade cleaning products once I've run out of what I have

Buy things in bulk to get rid of packaging (seeds, beans)
Norway overpacks its food like mad. Courgettes come single-wrapped in the supermarkets which is way excessive and actually quite shocking. I know there's an eco-shop in Trondheim, so we need to head down there with our own jars and boxes to pick up beans and seeds without any extra packaging. I also feel I should pick up some mesh bags so that I'm not putting fruit and vegetables in the plastic bags available at the supermarket.
Status: not good
Goal: check out shops in Trondheim where you can bulk buy dry goods without any extra packaging - and buy them!

Use dryer balls instead of dryer sheets
We don't have a tumble dryer!
Status: n/a
Goal: n/a

Have a waste-free period
Pads and tampons create a lot of waste in the world, that's just a fact. My interest has been piqued by period pants, but I still can't wrap my head around the diva cup / mooncup... That's a step I would have to leave for later. I'll definitely look out for period pants, especially to replace needing pantyliners.
Status: no bueno
Goal: get some period pants

Buy second hand as much as you can
I'm so bad at this when it comes to clothes. There's a huge thrift store nearby, so I feel I should make the most of it? I'm also looking around at things being given away on finn.no, and looking for flea markets. We have a lovely wooden chest of drawers that the neighbours were giving away, so that saved us having to buy new. It's so hard to resist the pull of IKEA...
Status: not the best
Goal: look for more thrift stores in the city, avoid "disposable fashion" from stores like Primark forever

Compost!
We throw away so many food scraps, that really could be made into compost. In London, my parents have a separate bin for compost and food scraps, and a little "caddy" which is lined with biodegradable bags. Some councils will offer a composting scheme, so it's worth checking to see if you can recycle your food scraps into wonderful fertiliser. You could also have a compost heap if you have a garden, and there are even small balcony composters available.
Status: not even close
Goal: look for a compost scheme nearby, or find a tutorial for a balcony composter

Recycle properly
Not many people know that if you throw things in the wrong bin, it could render the whole batch unable to be recycled. The same goes for dirty jars and cans - it contaminates the whole batch (this could be the entire dumpster, or even the entire truck) and this will all have to go into landfill. We already carefully rinse plastic packaging and cans - I save jars for use at home - and let them dry before we put into the recycling dumpsters. On many housing complexes here, there are dumpsters for landfill, for paper and cardboard, and for plastic. The dumpster for cans and jars is located by our nearest supermarket, so I save them all into a big bag, and throw away when I go to pick up milk.
For those living in Trondheim - here is a printable list of what you can throw where!
Status: pretty good!
Goal: find out where milk cartons can be recycled...(I just checked the website and apparently they go with paper - nice)

Reuse single use items as much as possible
I feel I'm better at this now than I used to be. Unfortunately we do use the plastic bags in supermarkets to buy fruits and vegetables, but I save them and use them to pack other things. I save all jars from jams and sauces, and they come in really handy for storing spices and small amounts of leftovers. I also use plastic yoghurt pots as nursery pots for plants, when I grow them from cuttings - I just poke drainage holes in the bottom and they make the perfect small growing pot.
Status: pretty good!
Goal: see if there's anything else we can store and reuse (rubber bands, other plastic bags...)

Stop buying shit you don't need
Guilty. I buy a lot of stuff. A LOT. Especially things that I feel might come in handy at some point in the future.
Status: not good at all
Goal: focus on quality over quantity, invest in good pieces that will last a long time

I'm going to revisit this post in some time, and see how well I've met my initial goals!


None of the items linked in this post have been sponsored. 
October 20, 2018 No comments


It's no secret that a whole roast chicken is tasty, easy, and absolutely value for money.

I was grocery shopping last week, and fancied some chicken to add to a green curry (R was away, so I'm channelling my inner Orc like looks like meat's back on the menu, boys! ). I'm normally fairly shocked by Norwegian prices as it is, but holy guacamole this was a whole other level that I was not mentally prepared for.

The cheapest, super-extra-value brand chicken breasts were about 92kr per kilogram. The slightly nicer, probably not pumped with too many extra hormones and water, were anything between 130 - 180kr per kilogram. I... what. That's so expensive. They had a whole supermarket brand chicken, 1.2kg, for around 60kr in total, and I paid 45kr on sale. The difference is probably not quite so colossal in other places, but here it makes complete sense to buy a whole bird and get roasting. You'll have two breasts, two legs, and plenty of bits of meat that you can use in a curry or a salad.

The general impression is that a roast chicken is complicated, but it's actually one of the easiest meals you can make! Here's how I do it:

Before you start:
- Make sure your chicken is at room temperature. If the inside is cold, it won't cook evenly and you'll have a burnt bird with raw meat in the middle.
- Preheat your oven to 180-200c

1. Prepare a base for your chicken. If you place the chicken directly on the pan, it will just boil in its own juices rather than roast to a delicious crispy finish - you can place on a wire rack, but I like to make a bed of veggies for a complete meal in one.

Here, I used quartered potatoes and a couple of cooking apples, as well as a some garlic cloves tucked between. I tossed them lightly in olive oil, salt, and pepper, and used my hands to flatten them into a somewhat even base.

If you want crispy potatoes, try to keep them a little more separated on a bigger tray or roasting pan. I was in the mood for soft, buttery fondant-style potatoes that would cook in the juices, so I've packed them quite tightly.


2. In order to make sure my chicken is delicious and juicy, I like to rub seasoned butter between the skin and the breasts. If you lift up the skin by the breasts, there will be a delicate membrane holding the skin attached to the edge of the breast. Poke your finger in, and you'll be able to access the entire cavity along the breasts, and also along the thighs.

I mix slightly softened butter with salt and pepper - this creates a tasty roast chicken that won't interfere with other flavours, should you use the leftovers with a sauce or in a salad - and I spread it all over the breasts under the skin, and along the thighs.


3. You can add another layer of juiciness by stuffing the chicken - you can use a halved lemon and some herbs, an orange, stuffing mix... In this case, I used a halved cooking apple.


4. I like to truss up the legs and booty so that the apple won't fall out. Here I used toothpicks to just hold the skin over the cavity and secure it in place.


5. Place the chicken on the bed of veggies or the rack.


6. Place the chicken in your preheated oven, with the legs pointing towards the back. As the back of the oven tends to be hotter than the front, this will make sure the tougher legs are cooked at the same time as the more delicate breasts.


7. Roast for around 1 hour and 30 minutes - my rule is 1.5kg bird, 1.5 hours in the oven. Adjust for a larger or smaller bird as necessary. You can piece the meat on the leg to check if it's done, if the juices run clear then your chicken is good to go!


8. Let the bird rest to relax the meat, and to let it absorb all the juices that were released in cooking. If you carve it straight away, those juices embedded in the meat will pour out, and you'll have dry, sawdusty chicken. No thanks!


Look at how juicy that chicken breast is! So simple, so delicious. And now I have chicken for another 3 or 4 meals - so also really great value for money. Yum!
October 19, 2018 No comments

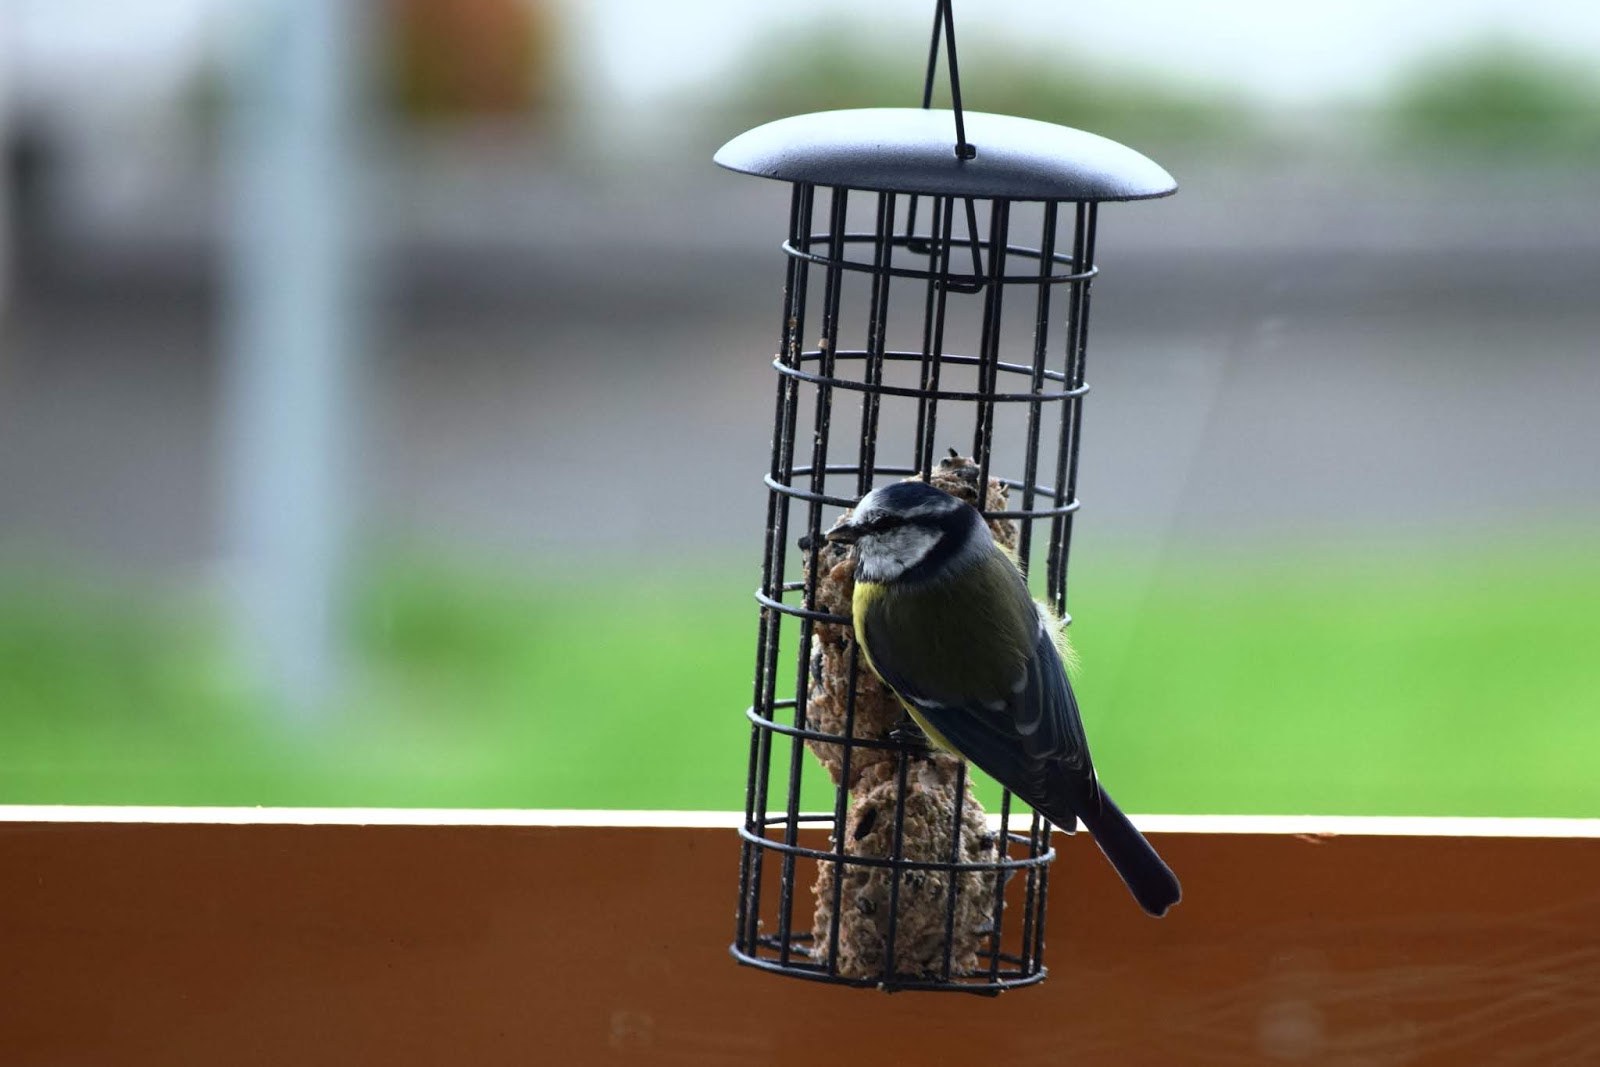
I love birds, as long as a) they're not pigeons, and b) they don't poop on me.

We are really lucky to have so many beautiful birds on the housing complex: many magpies, jackdaws and sparrows, and the occasional blue tit. I also saw a spotted nutcracker for the first time last week - I walk extra slowly around past that tree now, in the hopes of catching another peek. On the way to buy groceries a few days ago, I also saw a crow/raven (I can never tell them apart) and it was honest as big as a chicken. Absolute whopper of a bird, and beautiful black glossy feathers that I couldn't take my eyes off.

On our big trip to Plantasjen, when R took me to buy plants for the house, I whined my way into getting a bird feeder for the balcony and some suet balls.

We are mainly visited by magpies, with an occasional appearance from a juvenile blue tit. One of my favourite things to do is sit by the window in the morning, and just look at the birds.

Here are some of my favourite photos I took.


October 14, 2018 No comments
Older Posts

About me

About Me


. . .

A Polish girl, raised in the UK, engaged to an Indian boy whom she met in Spain... currently enjoying life in Norway.

I'm definitely a morning person.

Follow Me

Plant Wishlist

I am always up for swapping plant cuttings, hit me up if you are in Norway!!

Aglaonema commutatum (Chinese evergreen)
Alocasia amazonia
Alocasia zebrina
Alocasia zebrina reticulata
Aspidistra elatior (cast iron plant)
Caladium
Calathea lancifolia
Calathea medallion
Calathea musaica
Calathea orbifolia
Calathea ornata
Calathea zebrina
Callisia repens variegata
Ceropegia woodii (string of hearts)
Christia vespertilionis
Codonanthe crassifolia
Cordyline fructiosa "Miss Andrea" (ti tree)
Clusia rosea (autograph tree)
Dieffenbachia reflector
Dischidia nummularia (string of nickels)
Dischidia ruscifolia (million hearts)
Epipremnum aureum "Marble queen" (pothos)
Ficus elastica (rubber tree)
Ficus pumila (creeping fig)
Hoya carnosa (wax plant)
Hoya kerrii (valentine hoya)
Hoya mathilde
Hoya obovata
Hoya polyneura (fishtail hoya)
Iresine herbstii (bloodleaf)
Hypoestes phyllostachya (polka dot plant)
Macodes petola (jewel orchid)
Marantha leuconera fascinator tricolor (prayer plant)
Mimosa pudica (tickle me plant)
Monstera adansonii
Monstera siltepecana
Muehlenbeckia complexa (Australian ivy, maidenhair vine)
Oxalis livida
Oxalis triangularis (false shamrock)
Peperomia argyreia (watermelon peperomia)
Peperomia prostrata (string of turtles)
Philodendron brasil
Philodendron cordatum (heart-leaf philodendron)
Philodendron hederaceum lemon lime
Philodendron pink princess
Philodendron prince of orange
Philodendron rojo congo
Philodendron white knight
Pilea cadierei (aluminium plant)
Pilea libanensis
Rhaphidophora crypantha (shingle plant)
Sanseveria trifasciata (mother-in-law's tongue)
Saxifraga stolonifera tricolor (strawberry begonia)
Schefflera arboricola (umbrella tree)
Schlumbergera truncata (Christmas cactus)
Scindapsus pictus (satin pothos)
Senecio macroglossus (wax ivy)
Senecio rowleyanus (string of pearls)
Stephania erecta
Stromanthe sanguinea
Tolmiea menziesii (piggyback plant)
Tradescantia flumensis tricolor

Labels

Baking Bread Drinks Frugal Going green Home Knitting Plants The move Walking

recent posts

Created with by ThemeXpose